
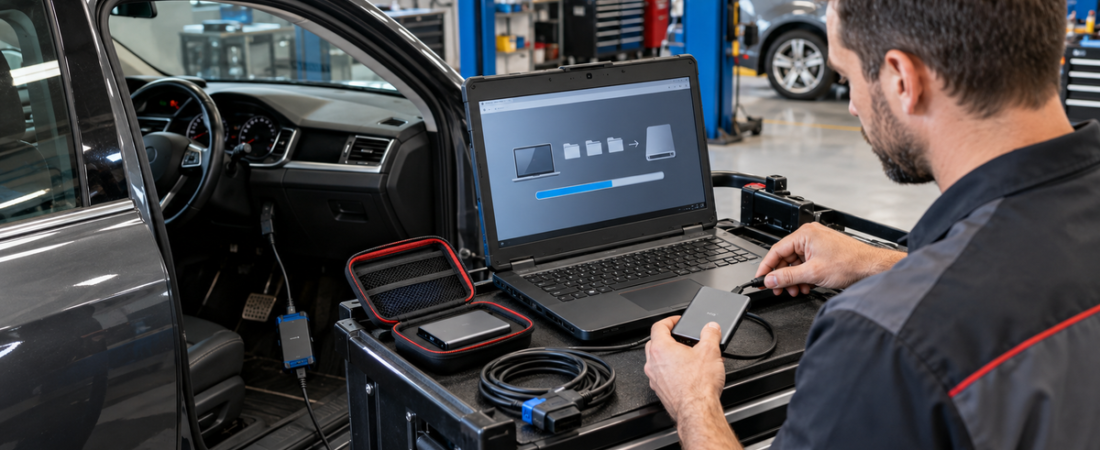
How to Back Up and Restore Your Automotive Diagnostic Laptop
An automotive diagnostic laptop can take days to rebuild. The operating system is only the beginning: VCI drivers, OEM applications, databases, network settings, reports, virtual machines, and carefully tested configurations all matter.
A useful backup plan protects both data and the complete working environment. This guide explains how to create an automotive diagnostic laptop backup, what to store, and how to test recovery without risking a live vehicle session.
Start with an Inventory of the Working Setup
Before copying files, document what makes the laptop functional. Record the Windows edition and version, laptop model, storage layout, installed diagnostic applications, database versions, VCI models, driver versions, and any required USB or network configuration. Save screenshots of interface-selection pages and note which physical ports have been validated.
Keep authorized installer records, account recovery information, and license documentation according to each vendor’s terms. Do not put passwords, activation secrets, or customer credentials in an unsecured text file. The inventory should help a legitimate operator rebuild the system without becoming a new security risk.
If the laptop is still being standardized, follow our reliable Windows 11 diagnostic laptop setup first. A clean, tested baseline is much more valuable than an image of a machine that already has driver conflicts.
Protect the Files That Change Every Day
Vehicle reports and workshop records change more often than the software stack, so back them up separately and frequently. Useful folders commonly include:
- Pre-scan and post-scan reports, screenshots, and exported live-data logs
- Repair-order folders and calibration records stored under the workshop’s privacy policy
- Verified installers, official drivers, update packages, and configuration exports
- Documentation for interface firmware, network settings, and tested software versions
- Virtual-machine folders after the VM has been shut down completely
Microsoft’s current Windows guidance distinguishes file backup from full recovery. Windows Backup can preserve selected folders, settings, app information, and Wi-Fi details through a Microsoft account, while File History can copy changing personal files to an external drive or network location. Either can help with ordinary file loss, but neither should be treated as the only recovery method for a specialized workshop workstation.
Create a Known-Good Full-System Backup
After every critical application and VCI has passed a real connection test, create a full-disk or system image with a reputable imaging tool supported by your workshop. The image should include Windows, installed programs, drivers, databases, services, and boot partitions. Label it with the date, laptop asset number, Windows version, and the major diagnostic packages it contains.
Create another image before a major Windows feature update, database upgrade, VCI firmware change, or broad driver replacement. A Windows restore point is useful for reversing some driver, application, registry, and system-setting changes, but it is not a substitute for an independent image when the internal drive fails.
For virtual machines, save a powered-off copy of the entire VM folder, not only a snapshot. Snapshots depend on the original virtual disk chain and can become difficult to manage over time. Our virtual machine vs native installation comparison explains where VM isolation helps and where direct hardware access remains preferable.
Use the 3-2-1 Rule
CISA recommends the 3-2-1 approach: keep three copies of important data, on two different types of media, with one copy stored offsite. For a small workshop, that can mean the working laptop, an encrypted external SSD kept locally, and an encrypted cloud or offsite copy controlled by the business.
Do not leave the external backup drive permanently attached. Ransomware, accidental deletion, electrical damage, or theft can affect both the laptop and a connected drive. Disconnect the local backup after a successful run, protect it physically, and restrict access to staff who actually perform recovery.
Prepare Windows Recovery and Encryption Keys
Create a Windows recovery drive while the laptop is healthy and remake it after major platform changes. Microsoft says recovery media can reinstall Windows even after the internal drive is replaced or erased. Store the USB drive with the laptop’s recovery documentation, not loose in the diagnostic cart.
If Device Encryption or BitLocker is active, confirm that the recovery key is saved in an approved location accessible from another device. Microsoft warns that an encrypted drive may be inaccessible without that key. Never keep the only copy on the encrypted laptop itself.
Also record the laptop’s firmware boot procedure and keep the manufacturer’s storage and network drivers available. A recovery image is far less useful if the replacement SSD cannot be detected or the technician cannot boot the recovery media.
Follow a Safe Backup Schedule
- After each workday: copy new reports, logs, screenshots, and configuration exports.
- Weekly: run the file backup, check its completion report, and disconnect the local backup drive.
- Monthly: verify backup storage health and restore a sample report to a separate folder.
- Before major changes: create a restore point and a fresh system image.
- After a proven change: test every critical VCI, then create a newly labeled baseline image.
Scan installers and backup media with active security tools before preserving a new baseline. If a diagnostic package triggers a warning, use the verification process in our diagnostic software antivirus guide rather than copying an unexplained detection into every backup generation.
Test the Restore Before an Emergency
A restore test should prove more than file visibility. First, restore several reports and configuration exports to an alternate folder and open them. Next, confirm that the recovery USB starts on the intended laptop. For a full image, use a spare compatible drive or an approved test system when possible; do not overwrite the working diagnostic disk merely to practice.
After a full restore, verify Windows activation, updates, security protection, time and region, USB controllers, network adapters, and free disk space. Then connect each VCI away from urgent programming work. Confirm Device Manager status, interface firmware, software selection, vehicle identification, a complete scan, report export, and clean shutdown.
Restore in the Right Order
When failure occurs, identify whether you need a file restore, a Windows recovery option, or a complete disk restoration. Use the least disruptive method that addresses the problem. Microsoft recommends backing up important files before recovery because some options remove apps, settings, or data.
- Secure current reports and any readable data before changing the damaged system.
- Record the failure symptoms and recent updates or driver changes.
- Try an appropriate Windows recovery option for a limited software problem.
- Restore the known-good image when the drive failed or the installation is no longer trustworthy.
- Apply current security updates, then restore newer workshop data.
- Validate every interface before returning the laptop to coding or programming work.
Final Checklist
A dependable backup plan combines frequent copies of changing files, periodic full-system images, powered-off VM backups, offline and offsite storage, a recovery drive, accessible encryption keys, and documented testing. Assign ownership to one person, record every successful backup, and retire old media securely. The goal is not simply to possess backup files. It is to return a verified diagnostic workstation to service with predictable downtime and no guesswork.
 English
 German
 Spanish
 Italian
 French
 Hebrew
 Dutch
 Finnish
 Norwegian
 Swedish
 Polish