How to Install OP-COM Software for Opel/Vauxhall Diagnostics (2010-2021 Versions)
OP-COM remains one of the most practical low-cost diagnostic options for Opel and Vauxhall owners who want access beyond a generic code reader. It is especially useful when you need model-specific fault code reading, service functions, and basic module access on GM-platform vehicles without stepping up to a more expensive workshop platform.
The challenge is that the OP-COM package is not a single one-click installer. The local source bundle includes drivers plus four software branches, each with a slightly different setup path. This guide turns that package into a clear workflow so you can choose the correct version, install the right files, and get to a successful first connection faster. If you are new to scan tools in general, start with our beginner’s guide to OBD2 diagnostic software before setting up your interface.
What You Need Before Installing OP-COM
Begin with a Windows laptop that has administrator rights and a stable USB port. The local OP-COM source package contains five folders, including the driver set and the four software versions. Extract everything fully before you run anything. Like many diagnostic tools, OP-COM behaves better when the laptop is plugged into AC power and background security interruptions are kept under control.
- A Windows laptop with administrator access
- The extracted OP-COM software package with all five folders visible
- Your OP-COM interface and USB cable
- A direct USB port on the laptop, not a hub
- Enough time to test the interface on the vehicle after installation
Which OP-COM Version Should You Use?
The source material makes one thing clear: the package is designed to cover several Opel and Vauxhall generations, not just one release. Choosing the right branch first will save time.
- OP-COM 2010: best for older vehicles and simple run-only use. There is no installer. You launch
OP-COM.exedirectly as administrator. - OP-COM 2012: similar to the 2010 branch, also run-only, with no full installer step required.
- OP-COM 2014 with OC Flash: intended for users who may need a normal installer plus access to the OC Flash tool for interface firmware changes.
- OP-COM 2021: positioned in the source bundle as the version for cars from 2011 through 2021, using a standard installer workflow.
Step 1: Download the Bundle and Extract It Completely
Do not run OP-COM from inside the archive. The source instructions begin with downloading the bundle and unzipping it so you can see the internal folders clearly. Full extraction matters because the driver files and launch files must sit in normal Windows folders if you want reliable access and permissions.
- Download the OP-COM bundle from the source package link provided with your purchase.
- Save it to a local drive, not a temporary browser folder.
- Extract the archive with 7-Zip or WinRAR.
- Confirm that you can see the five folders inside the extracted package.
- Keep the folder path simple so Windows does not create permission or path-length issues.
If Windows Security or another antivirus product tends to quarantine activation or launch files, prepare the installation folder before first launch. Our diagnostic software errors and fixes guide covers that pattern in more detail.
Step 2: Install the OP-COM Drivers First
The local source specifically tells you to install the drivers from the OPCOM Drivers folder before working with any of the software versions. That order matters. If Windows has not been prepared to recognize the interface correctly, the program may open but fail when it tries to communicate with the hardware.
- Open the extracted
OPCOM Driversfolder. - Run the included driver installer as administrator.
- Allow Windows to complete the driver setup fully.
- Reconnect the interface only after the driver stage has finished.
- Check Device Manager to make sure the interface is detected without warning icons.
Step 3: Launch 2010/2012 Directly or Install 2014/2021
Once the driver is in place, the next step depends on which software branch matches your vehicle range and interface.
For OP-COM 2010 ו- OP-COM 2012, the source notes that no full installation is required. You simply open the relevant folder and run OP-COM.exe as administrator. This makes those versions quick to test, especially on older systems.
For OP-COM 2014 ו- OP-COM 2021, the process is more conventional. Run the installer as administrator, complete the setup, and then launch the software as administrator after installation. If you are using the 2014 release and the interface firmware needs adjustment, the included OC Flash utility is the tool the package expects you to use.
- Choose the correct version folder based on the vehicle model year and your interface needs.
- For 2010 or 2012, run
OP-COM.exeas administrator. - For 2014 or 2021, run the installer as administrator and wait for setup to finish.
- Launch the software again as administrator after installation.
- Only use OC Flash when firmware changes are actually needed on the tool.
Step 4: Connect the Interface and Perform a First Test Scan
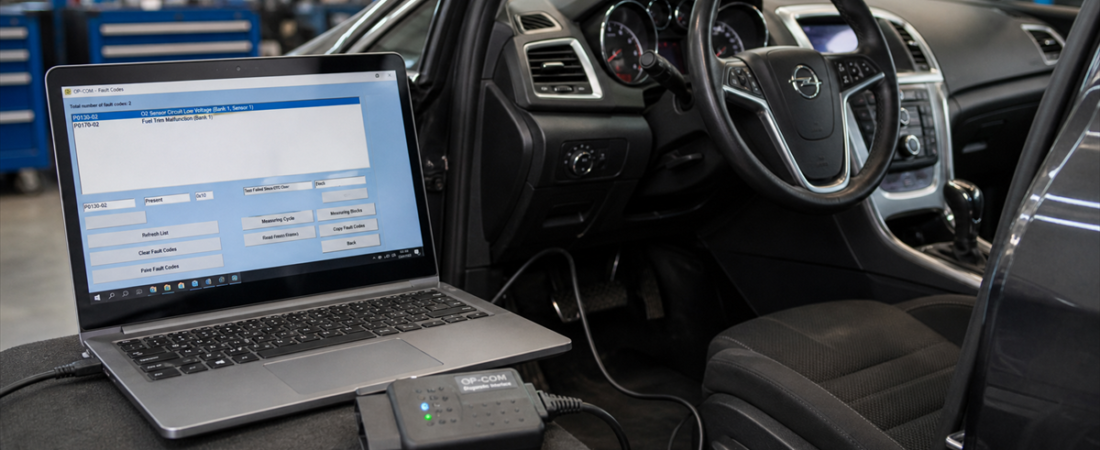
With software and drivers loaded, move to a real-world test. Connect the OP-COM interface directly to the laptop, plug it into the vehicle’s OBD-II port, switch the ignition on, and then open the software. Select the correct Opel or Vauxhall model information before reading fault codes.
- Connect the interface through a direct USB port.
- Plug the OP-COM device into the vehicle OBD-II socket.
- Turn the ignition on with the engine off unless the software instructs otherwise.
- Open OP-COM as administrator and confirm the interface is recognized.
- Run an initial scan before clearing codes or changing settings.
That first scan tells you whether the driver, USB connection, and software version are aligned properly. If your shop also uses wider multi-brand tools, compare the workflow with our Delphi vs Autocom vs WOW comparison to understand why OP-COM is more focused but often more useful on Opel and Vauxhall vehicles.
Common OP-COM Problems and Quick Fixes
- Software opens but no interface is found: reinstall the driver from the package, switch to a direct USB port, and recheck Device Manager.
- No communication with vehicle: confirm ignition state, OBD plug seating, and that the correct model and system were selected.
- Program will not launch: right-click and run as administrator, then verify that security software did not remove a required file.
- Wrong version for the car: move from 2021 back to 2014, 2012, or 2010 when working with older Opel or Vauxhall platforms.
- Interface firmware mismatch: use the 2014 package and OC Flash only when the tool genuinely needs a firmware adjustment.
Final Takeaway
OP-COM installation becomes straightforward once you respect the sequence in the source bundle: extract the package fully, install the drivers first, choose the right software branch, run the program with administrator rights, and confirm live vehicle communication before calling the job complete.
For Opel and Vauxhall owners, independent garages, and specialists who need affordable brand-specific diagnostics, OP-COM still offers strong value. The important part is not treating every version the same. Match the release to the vehicle year range, keep the driver setup clean, and your first scan usually comes together without much drama.
 English
  German
  Spanish
  Italian
  French
  Hebrew
  Dutch
Dutch  Finnish
  Norwegian
  Swedish
  Polish