
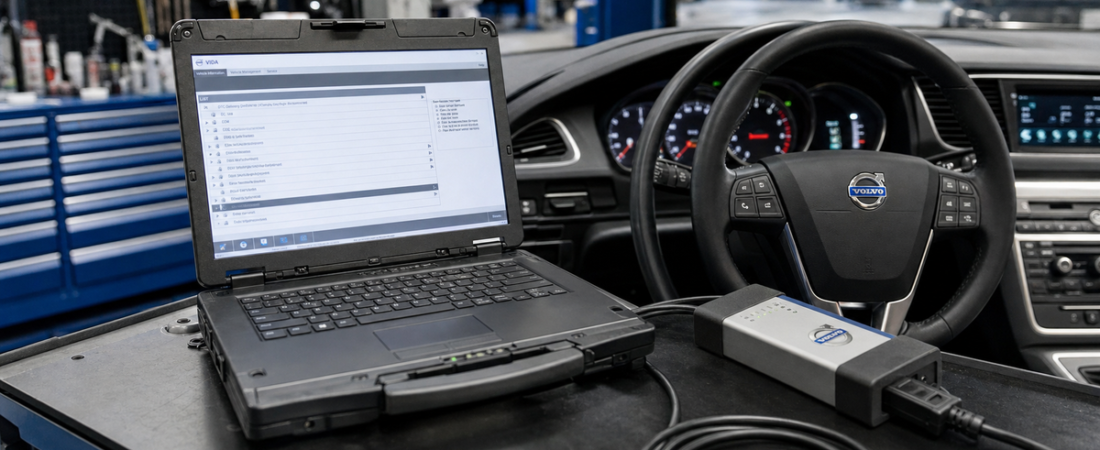
Volvo VIDA 2014D Installation on Windows 10/11: Full Setup with SQL Server & J2534 Driver
Volvo VIDA 2014D remains one of the most useful factory-style diagnostic platforms for older Volvo vehicles, but installing it on a modern Windows 10 or Windows 11 laptop is not as simple as running one setup file and clicking Next. The package depends on Microsoft .NET Framework 3.5, a working SQL Server 2008 R2 installation, the correct patch sequence, and a properly installed communication driver before the first vehicle session will behave normally.
This guide turns the raw Volvo VIDA source files in the local OBD-Soft library into a workflow you can actually follow. It covers the Windows install path, first-login details, J2534 and DICE driver notes, and the VirtualBox fallback for users who want an isolated setup. If you are still deciding what interface belongs on your diagnostic laptop, read our J2534 vs OEM VCI vs ELM327 comparison. If the car refuses to link after installation, our no communication with vehicle troubleshooting guide will help you isolate the hardware side faster.
What You Need Before You Start
Before launching the installer, use an administrator account, keep the laptop on AC power, and extract the VIDA package to a local drive instead of running it from a compressed archive or external storage.
- A Windows 10 or Windows 11 PC with administrator rights
- The VIDA 2014D installation package fully extracted
- .NET Framework 3.5 enabled in Windows Features
- A Volvo-compatible interface such as DICE or a supported J2534 pass-thru device
- Time to let SQL Server and VIDA finish without interruption
Step 1: Enable .NET 3.5 and Prepare the VIDA Folder
Start with the Windows prerequisite that trips up many users. Open Control Panel > Programs and Features > Turn Windows features on or off, then enable .NET Framework 3.5. Windows may download the required files automatically, and some systems will request a restart. If .NET 3.5 is already installed, move straight to the package itself.
Next, extract the VIDA archive and open the folder in File Explorer. The install process is built around a series of command files, so grant administrator permission whenever Windows asks for it.
Step 2: Install SQL Server 2008 R2 the Correct Way
Run 01_SQL.cmd as administrator. This step installs Microsoft SQL Server 2008 R2, which VIDA uses as part of its local data and application environment. Do not force-close the command window if it looks quiet for a while. The local guide says the window should close automatically once the job is complete.
After that, verify the SQL installation from the SQL Server Installation Center. Open the installed features discovery report and confirm the expected components are present. The source notes that seeing two rows in the report is the normal result for this package.
Step 3: Install VIDA All-in-One
With SQL in place, run 02_VIDA.cmd. When the installer opens, choose VIDA All-in-One, select your preferred language, accept the license agreement, and keep the default install path unless you have a specific reason to change it. The local instructions recommend leaving VIDA on the C: drive because later patching assumes the default layout.
During the installation, wait patiently. You can watch the alba process in Task Manager if you want proof the installer is still working. Once the desktop shortcuts appear, choose Internet, click Save, then Sulje. If the installer asks for a restart immediately, decline it for now and continue with the patch sequence first.
Step 4: Install the Driver and Apply the VIDA Patch
This is the point where the install becomes hardware-dependent. If you are using a Mongoose-style J2534 device, install the correct J2534_Driver_x86 or J2534_Driver_x64 package for your system. If you are using a Volvo DICE-style interface, install the DICE driver package, then reboot the computer if the driver setup requests it.
Once the driver is ready, make sure VIDA Monitor is not running and launch 03_patch.cmd. If you installed VIDA on the default drive, you should not need to edit the patch path. If you used another drive letter, only change the drive reference. Select the install option in the patch window, allow Java through the firewall if Windows prompts for it, and wait for VIDA Monitor to start.
You want the tray icon to move from a yellow state to a green arrow. On fully updated Windows 10 and Windows 11 systems, the source material also recommends using the provided VIDA 2014D.vbs startup script for more reliable launches.
Step 5: First Login and First Vehicle Connection
Open VIDA from the desktop shortcut, the Start menu, or the VIDA Monitor tray icon. If Internet Explorer asks to enable add-ons, allow them so the interface can render properly. For European-region setups, the local guide specifies the username 4.
After login, wait for IsoView to load, then open the Vehicle Profile tab and enter the VIN manually. The source specifically warns that if VIDA shows an Access Denied error, typing the VIN by hand works better than copy-paste.
If your first connection is unstable, verify the same fundamentals we covered in our diagnostic software best practices guide: stable vehicle voltage, a reliable USB connection, the correct interface selected, and no background sleep or update events interrupting the session.
VirtualBox Alternative for Easier Deployment
The local OBD-Soft materials also include a VirtualBox-based VIDA option for users who do not want to build the Windows environment from scratch. Create a new VirtualBox machine named VIDA, select Windows 10 (64-bit), assign at least 2 GB of memory, and attach the provided existing virtual disk.
Set the chipset to PIIX3, allocate reasonable CPU resources, enable VBoxSVGA, and start the VM. After the guest boots, install VirtualBox Guest Additions so the environment runs more smoothly.
Common VIDA 2014D Problems and Fast Fixes
- VIDA Monitor stays yellow: Re-run the patch, confirm Java firewall access, and verify SQL actually installed.
- Username field is inactive: Run 03_patch.cmd again, reboot, and relaunch VIDA.
- Access Denied after entering the VIN: Type the VIN manually instead of pasting it.
- Tool-selection window is inactive: Import the correct registry fix for your operating system if it is included in the package.
- Interface not detected: Reinstall the DICE or J2534 driver and confirm Windows Device Manager shows the hardware normally.
After everything is working, disable unnecessary VIDA startup items such as VIDA eUpdate if you do not need them running at boot. The source notes that Adobe Reader XI can also be removed if you already use another PDF viewer.
Lopullinen johtopäätös
Volvo VIDA installation on Windows 10 becomes much more manageable when you treat it as a sequence: enable .NET 3.5, install SQL Server with 01_SQL.cmd, install VIDA with 02_VIDA.cmd, add the correct DICE or J2534 driver, then patch and launch the platform in the right order.
Follow the workflow above and VIDA 2014D can still be a dependable factory-style solution for pre-2014 Volvo diagnostics on modern hardware. If you prefer a simpler deployment model, the VirtualBox version is a practical fallback that keeps the environment contained and repeatable.
 English
  German
  Spanish
  Italian
  French
  Hebrew
  Dutch
Dutch  Finnish
  Norwegian
  Swedish
  Polish