
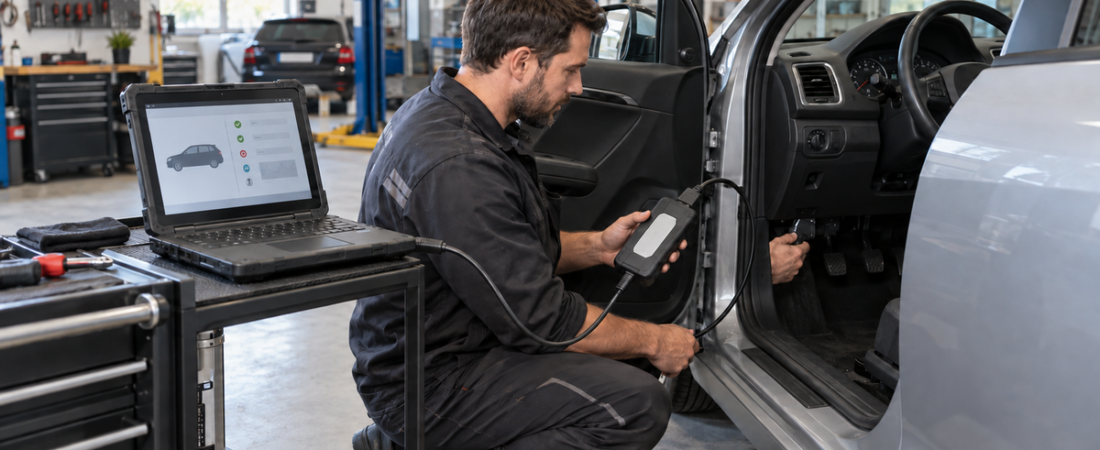
WOW 5.00.12 is a legacy release of Würth Online World’s multi-brand diagnostic software. With the correct licensed interface, it can provide fault-code reading, live data, actuator tests, service functions, and other vehicle-specific diagnostics for models included in its database.
Detta WOW 5.00.12 installation guide explains how to prepare a workshop laptop, install an authorized package, configure the diagnostic interface, and complete a safe first connection. It does not use key generators, altered system dates, modified files, or shared activation codes. Those shortcuts can compromise the laptop, invalidate support, and create unreliable results.
Confirm That Version 5.00.12 Is Appropriate
Version 5.00.12 is old, so check its vehicle coverage before scheduling work. It cannot contain every later control unit, secure gateway, or manufacturer update. Use it only when your licensed hardware and target vehicle are documented as compatible.
Current WOW software supports the company’s LOOQER and Snooper+ interfaces. Version 5.00.12 is commonly associated with Snooper+ hardware, but its installer, license, firmware, and interface generation must match.
What You Need Before Installation
- A dedicated Windows laptop compatible with your licensed 5.00.12 package
- Administrator access and enough storage for the software and vehicle database
- The complete installer from WOW, Würth, or an authorized distributor
- A valid license associated with the intended software modules
- A supported Snooper+ or other interface explicitly approved for that package
- A known-good USB cable and Bluetooth hardware if wireless use is required
- Internet access for legitimate registration, updates, and support
- A battery support unit for long scans, coding, or adjustment work
Record the interface serial number, software version, licensed modules, and distributor details. Verify any package that lacks documentation tying it to the VCI.
Step 1: Prepare the Windows Laptop
Connect the charger, apply supported Windows updates, restart, and keep the date and time correct. A false date can break certificates, updates, and reports; it is not legitimate activation.
Disable sleep while the laptop is plugged in and create a backup if it already contains working diagnostic tools. Keep Windows Security enabled. Scan the installer and confirm its source or digital signature where available. If a file is detected, investigate it with the distributor instead of creating a broad permanent exclusion. Our antivirus warning guide for diagnostic software provides a safer review process.
Step 2: Extract and Install WOW 5.00.12
- Koppla bort VCI:n. Leave the interface unplugged until the main application and documented drivers are ready.
- Copy the package locally. Keep an untouched backup, then extract the full ZIP or archive to a short folder path.
- Check the package structure. Confirm that setup files, database content, and documentation belong to the same release.
- Kör det officiella installationsprogrammet som administratör. Use the documented setup or starter executable and follow the installation wizard.
- Choose the licensed modules. Install only the diagnostics and technical-data components included with your agreement.
- Select the correct VCI. Choose the exact Snooper+ or approved interface entry supplied by the distributor.
- Allow prerequisites to finish. Supporting drivers or Windows components may open separate installation windows.
- Starta om Windows. Reboot before attempting interface configuration.
WOW’s current manual-installation process also requires fully extracting the ZIP and starting the provided installer. Do not move an unknown preinstalled folder into the system drive.
Step 3: Complete Licensed Registration
Launch WOW using the installed shortcut. If the software requests registration, follow the process provided with the licensed VCI and customer account. Enter only codes issued through WOW, Würth, or the authorized seller. The enabled modules should match the invoice or subscription.
Stop if instructions require a false date, key generator, internet block, or generated codes. These do not create a legitimate license. Contact the distributor if activation fails.
Step 4: Install and Configure the Interface
Install the driver intended for the exact interface model and software release. Avoid generic driver bundles because they can assign the wrong virtual COM port or overwrite a working driver. Once installation finishes, power the VCI from the vehicle’s diagnostic connector and connect it to the laptop by USB.
- Open WOW and go to the device or interface configuration area.
- Select the documented interface type and USB connection.
- Search for the device or select the COM port shown in Windows Device Manager.
- Run the built-in connection test and confirm the displayed serial number.
- Install firmware only when the official software identifies a compatible update.
- Keep the vehicle, laptop, and cable powered until firmware installation completes.
Never load firmware intended for a different VCI revision. An interrupted or mismatched update can make the interface unusable. For a broader explanation of interface types, read our J2534, OEM VCI, and ELM327 comparison.
Step 5: Configure Bluetooth After USB Works
USB removes pairing and radio variables, so validate it first. To add Bluetooth, keep the VCI powered through the vehicle, enable Bluetooth on the laptop, and search from WOW’s interface settings. Choose the serial number printed on your device, pair it as documented, and run the connection test again.
If the VCI will not connect, remove the failed pairing, restart both devices, and repeat the search nearby. Do not change firmware for a Windows pairing problem.
Step 6: Perform the First Vehicle Scan
- Check battery condition and attach support equipment when the procedure requires it.
- Connect the VCI to the OBD port, then connect USB to the laptop.
- Switch the ignition on without starting the engine unless WOW instructs otherwise.
- Select the exact vehicle, year, engine, and system, or verify automatic VIN identification.
- Run a complete system scan and save the original report before clearing codes.
- Open one supported module and confirm fault codes, identification, and live data are plausible.
- After repairs, repeat the scan and save a post-scan report.
Do not begin coding or actuator tests merely because reading codes works. Confirm battery voltage, prerequisites, and recovery instructions first. A legacy release may also lack access to newer protected modules. Our Secure Gateway guide explains why a tool may read codes but cannot clear or change protected systems.
Common WOW Connection Problems
The VCI Is Not Detected
Confirm that the interface is powered, try another USB cable and port, and inspect Device Manager for a driver or COM-port warning. Reinstall only the correct vendor driver.
The Connection Test Passes but the Vehicle Does Not Respond
Verify ignition state, battery voltage, vehicle selection, OBD connector condition, and cable seating. Test another supported vehicle before concluding that the VCI has failed.
Functions Are Missing or Locked
Check the installed modules, license status, database age, and vehicle coverage. Modern Security Portal functions require an active supported license and appropriate registration; an old installation cannot bypass those requirements.
Keep the Diagnostic Setup Reliable
After the first successful scan, save a clean laptop backup and document the software, database, driver, firmware, and license versions. Test the VCI before booked jobs and retain scan reports. For newer vehicles or current security access, use the latest licensed WOW release supported by your hardware.
 English
  German
  Spanish
  Italian
  French
  Hebrew
  Dutch
Dutch  Finnish
  Norwegian
  Swedish
  Polish