התקנה והפעלה של Toyota Techstream: הגדרת תוכנת אבחון "עשה זאת בעצמך" באמצעות כבל Mongoose
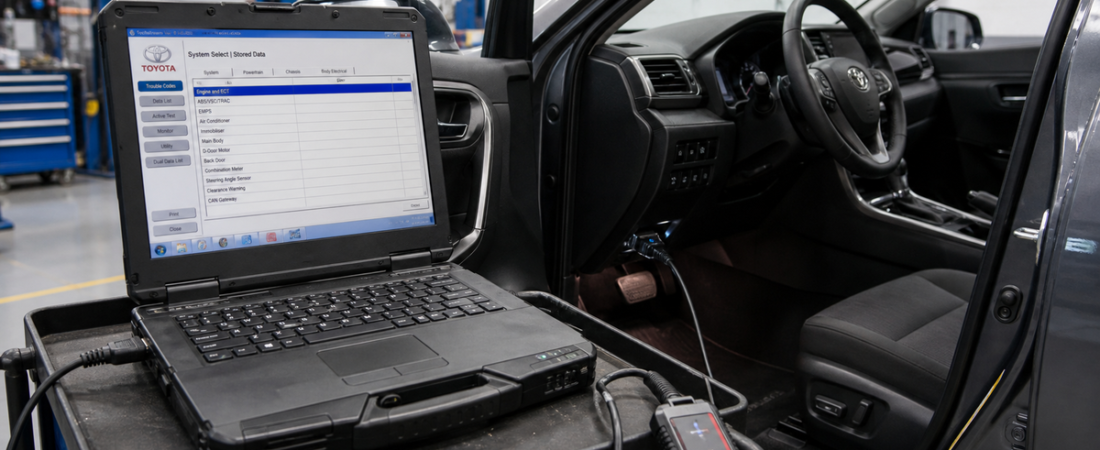
Toyota Techstream הוא אחד מכלי האבחון השימושיים ביותר לבעלי רכבי טויוטה ולקסוס, שכן הוא חורג מקריאת קודים כללית ומספק גישה לסריקות ברמה של סוכנות, נתונים בזמן אמת, בדיקות פעילות ופונקציות שירות, והכל ממחשב נייד עם מערכת ההפעלה Windows.
מה שמאט בדרך כלל את התהליך אינו תוכנת ההתקנה עצמה, אלא כל הרצף של הפעולות הנלוות אליה: הכנת תוכנת האנטי-וירוס, מנהל ההתקן של Mongoose, תפריט הבחירה של VIM וקיצור הדרך הנכון לתיקון. קובץ המקור המקומי של OBD-Soft כולל את השלבים הללו, ומדריך זה הופך אותם לתהליך עבודה מסודר יותר ב-Windows 10 ו-11.
אם אתם עדיין בונים את מערך האבחון שלכם, התחילו עם ה- מדריך למתחילים לתוכנת אבחון OBD2 וה- השוואה בין תוכנות אבחון מקוריות (OEM) לתוכנות אבחון משוק המשך כדי שתדעו מדוע כדאי להתקין את Techstream אם אתם עובדים באופן קבוע על רכבי טויוטה או לקסוס.
מה דרוש לכם לפני שתתחילו
לפני הפעלת תוכנית ההתקנה, יש להכין את המחשב הנייד ואת החומרה כראוי. המדריך המקומי של Techstream מתחיל בהשבתה זמנית של ההגנה בזמן אמת של Windows ובפתיחת הארכיון באמצעות הסיסמה שסופקה. אין זה אומר שהחבילה מסובכת, אך הדבר כן מצביע על כך שכדאי להתקין אותה על מחשב נייד ייעודי לאבחון, שבו קל יותר לשלוט בהחרגות אבטחה, במנהלי התקנים ובהרשאות לכבלים.
- מחשב נייד עם מערכת ההפעלה Windows בעל הרשאות מנהל
- חבילת Techstream 17 שחולצה
- כבל האבחון מסוג Mongoose שברשותך או ממשק תואם
- יציאת USB ישירה במחשב הנייד
- רכב מסוג טויוטה או לקסוס לצורך בדיקת החיבור החי הראשונה
השתמשו באספקת חשמל זרם חילופין (AC) למחשב הנייד ושמרו על מתח יציב ברכב אם אתם מתכננים לבצע סריקה במשך זמן ממושך.
שלב 1: הכנת Windows וחילוץ החבילה
ההוראות המקוריות מתחילות ב"אבטחת Windows". חפשו את אבטחת Windows, פתוח הגנה מפני וירוסים ואיומים, לחץ על ניהול הגדרות, ולעבור באופן זמני הגנה בזמן אמת כבה את המחשב בזמן התקנת החבילה. לאחר מכן, חלץ את הארכיון לתיקייה מקומית רגילה באמצעות הסיסמה obd4com.
- פתח את 'אבטחת Windows' מתפריט 'התחל'.
- עבור אל 'הגנה מפני וירוסים ואיומים'.
- פתח את 'הגדרות ניהול' והשבית באופן זמני את ההגנה בזמן אמת.
- חלץ את ארכיון Techstream במלואו לתיקייה מקומית.
- ודא שתוכנת ההתקנה, תיקיית מנהלי ההתקנים ותיקיית התיקונים נראות כולן לאחר החילוץ.
שלב 2: הפעל את תוכנת ההתקנה של Techstream כהלכה
לאחר חילוץ הקבצים, הפעל את תוכנית ההתקנה הראשית של Techstream ופעל לפי ההנחיות הרגילות של Windows. הפרט החשוב ביותר המופיע בחומר המקור הוא ההנחיה לרישום במהלך ההתקנה: כאשר תוכנית ההתקנה מבקשת משתמש ו- שם החברה, הזן 123 עבור שני השדות או בדיוק כפי שמופיע בהנחיות בבנייה שלך.
- הפעל את תוכנית ההתקנה של Techstream כמנהל מערכת.
- פעל לפי הוראות אשף ההתקנה מבלי לשנות אפשרויות אקראיות ללא צורך.
- כאשר מופיעים שם המשתמש ושם החברה, הזן 123.
- המתן עד לסיום ההתקנה במלואה לפני פתיחת התוכנית.
שלב 3: טיפול בהנחיות ההפעלה הראשונית
לאחר ההתקנה, פתחו את Techstream בפעם הראשונה. המקור המקומי מציין שתי בקשות שעלולות לבלבל משתמשים חדשים. ראשית, כאשר התוכנה מבקשת פרטי החברה, הזן 1. שנית, כאשר Techstream מבקשת מפתח מוצר, לחץ על ביטול במקום לנסות ערכים אקראיים.
- הפעל את Techstream לאחר סיום ההתקנה.
- הזן 1 בשורת הפקודה "פרטי החברה".
- כאשר חלון 'מפתח המוצר' מופיע, לחץ על ביטול.
שלב 4: התקן את מנהל ההתקן של Mongoose ובחר את ה-VIM המתאים
זהו השלב שמבדיל בין התקנה תקינה של Techstream לבין תהליך מתסכל שבו אין תקשורת. קובץ המקור מורה לך לפתוח את ה- תפריט הגדרות, בחר VIM Select, התקן את מנהל ההתקן של הכלי שלך מהתיקייה "drivers" המצורפת, ולאחר מכן בחר מונגוס JLR כממשק בתוך Techstream.
- ב-Techstream, פתח את החלק העליון תפריט הגדרות.
- בחר VIM Select.
- התקן את מנהל ההתקן של הכבל מתוך תיקיית מנהלי ההתקנים המצורפת.
- בחר מונגוס JLR כממשק הפעיל.
- סגור את Techstream לאחר שמירת בחירת הממשק.
למרות שמדובר בתוכנה של טויוטה, החבילה שסופקה מצפה שהממשק יופיע כ-Mongoose JLR. אם Techstream לא יזהה את הכבל בהמשך, יש לחזור תחילה לתפריט זה.
אם נתקלתם בבעיית חיבור לאחר ההתקנה, בצעו את הבדיקות המפורטות במדריך שלנו אין תקשורת עם מדריך לאיתור תקלות ברכב לפני שתאשימו את התוכנה עצמה. ברוב המקרים, הבעיה נובעת מהדרייבר, מבחירת הממשק, ממצב ההצתה או מנתיב ה-USB, ולא מהתקנה לקויה של Techstream.
שלב 5: הוספת קיצור הדרך הנכון לתיקון
לאחר מכן, קובץ המקור של Techstream עובר לתיקיית ה-patch. פתחו אותה ובחרו בקיצור הדרך המתאים לארכיטקטורת המערכת שלכם. במערכת Windows של 32 סיביות יש להשתמש בקיצור הדרך של 32 סיביות, ואילו במערכת Windows של 64 סיביות יש להשתמש בקיצור הדרך של 64 סיביות. העבירו את קיצור הדרך המתאים לשולחן העבודה, כך שיהפוך לשיטת ההפעלה הרגילה שלכם.
- פתח את ה- תיקון התיקייה שבחבילה שחולצה.
- בחר את קיצור הדרך המתאים למערכת ההפעלה שלך.
- העבר את קיצור הדרך הזה לשולחן העבודה.
- השתמש בקיצור הדרך של התיקון בשולחן העבודה להפעלות עתידיות.
שלב 6: חברו את הכבל והפעילו את הסריקה הראשונה שלכם
כעת תוכלו לעבור לרכב. חברו את הממשק למחשב הנייד ולרכב, הפעילו את ההצתה, ולאחר מכן פתחו את Techstream באמצעות קיצור הדרך של התיקון לשולחן העבודה. משם, התוכנה אמורה להיות מוכנה לזהות את הממשק ולהתחיל בפעולת אבחון.
- חבר את הכבל ליציאת USB ישירה במחשב הנייד.
- חבר את הממשק ליציאת ה-OBD-II של טויוטה או לקסוס.
- הפעל את מתג ההצתה כשהמנוע כבוי, אלא אם כן ההליך שלך מחייב אחרת.
- הפעל את Techstream באמצעות קיצור הדרך של התיקון.
- בצע בדיקת תקינות ראשונית או סריקת מערכת לפני ביצוע שינויים.
בעיות נפוצות בהגדרת Techstream ופתרונות מהירים
- Techstream נפתח אך הכבל לא מזוהה: התקן מחדש את מנהל ההתקן, חבר מחדש את הממשק, ואשר מונגוס JLR עדיין נבחר ב-VIM Select.
- אין תקשורת עם הרכב: בדוק את מצב ההצתה, את חיבורי הכבלים, את מתח הסוללה ואת יציבות חיבור ה-USB לפני שתתקין מחדש את התוכנה.
- קיצור הדרך של התיקון אינו פועל: ודא שהשתמשת בקיצור הדרך המתאים לארכיטקטורת Windows במחשב הנייד הזה.
- תוכנת אבטחה מחקה קבצים: שחזר את הקבצים שהועברו להסגר, הוסף החרגה מדויקת לתיקיית Techstream, וחזור על שלבי ההתקנה הסופיים.
- הנהג הותקן אך עדיין אינו יציב: חבר את המכשיר ליציאת USB ישירה אחרת והימנע משימוש במפצלים או בתחנות עגינה.
מסקנה סופית
הדרך המהירה ביותר להשלים בהצלחה מדריך התקנה ל-Techstream הדרך הנכונה היא להתייחס לתהליך כאל שלוש משימות נפרדות: התקנת התוכנה, הגדרת ממשק Mongoose כהלכה, והפעלה תמיד באמצעות קיצור הדרך המתאים. רצף פעולות זה הוא בדיוק מה שתוכנת המקור המקומית OBD-Soft תומכת בו, וזו הסיבה שמשתמשים מנוסים מגיעים לסריקה ראשונה יציבה מהר יותר מאשר משתמשים מתחילים שקופצים ישר לרכב.
ברגע ש-Techstream פועל כראוי, הוא הופך לאחד מכלי האבחון השימושיים ביותר לרכבי טויוטה ולקסוס, שניתן להחזיק במחשב נייד ייעודי במוסך. אם תפעל לפי סדר ההתקנה המבוסס על המקור המפורט לעיל, החיבור הראשון שלך אמור להיות תהליך שגרתי ולא מתסכל.
 English
  German
  Spanish
  Italian
  French
  Hebrew
  Dutch
Dutch  Finnish
  Norwegian
  Swedish
  Polish