
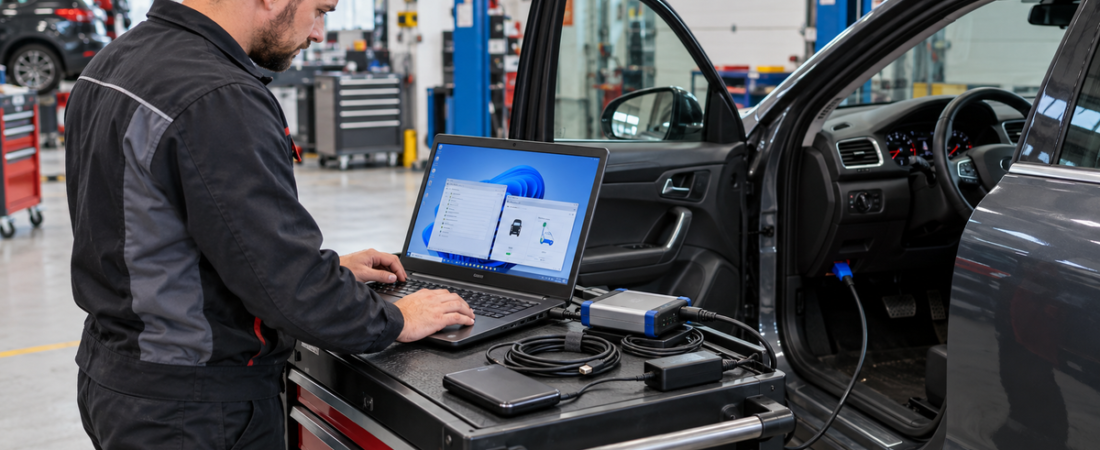
A reliable diagnostic laptop is workshop equipment, not just an office computer with a scan program installed. It must maintain stable communication with vehicle interfaces, stay awake during long procedures, preserve reports, and recover cleanly when a driver or software update causes trouble.
Windows 11 can provide a secure and dependable platform when the hardware, power settings, network adapters, drivers, updates, and backups are planned together. The goal is not to strip Windows down. It is to create a documented configuration that supports the diagnostic applications your workshop actually uses.
1. Check Software Requirements Before Buying Hardware
List every OEM and multi-brand platform, VCI, pass-thru device, and remote-support tool the laptop must run. Record supported Windows edition, processor architecture, RAM, storage, required ports, display resolution, network connection, virtualization needs, and whether the publisher permits installation together with other suites.
Microsoft’s Windows 11 minimums include a supported processor, 4 GB of RAM, 64 GB of storage, UEFI Secure Boot capability, and TPM 2.0. Those are operating-system minimums, not a good workshop target. Diagnostic databases, virtual machines, report archives, and programming packages need considerably more headroom.
2. Choose Practical Workshop Hardware
For a new general-purpose diagnostic laptop, 16 GB of RAM, a current four-core or better processor, and a 512 GB SSD are sensible starting points. Choose more memory and storage if several large OEM suites or virtual machines will be installed. A replaceable or serviceable SSD is valuable, but only when supported by the manufacturer.
- Ports: prioritize reliable USB-A ports, USB-C, and built-in Ethernet or a proven adapter.
- Skjerm: use a bright 1080p or better screen large enough for wiring diagrams and live-data graphs.
- Power: select a healthy battery and keep the correct AC adapter with the laptop.
- Cooling: avoid thin systems that throttle heavily during long installations or programming sessions.
- Durability: consider a business or semi-rugged model with a stable hinge, spill-resistant keyboard, and replaceable charger cable.
The VCI still determines which vehicle protocols are available. Our J2534, OEM VCI, and ELM327 comparison helps match the interface to the intended work.
3. Start with a Clean, Supported Windows 11 Installation
Install a legitimate, activated Windows 11 edition on supported hardware. Complete Windows Update, reboot until no required updates remain, then install chipset, graphics, Ethernet, Wi-Fi, and USB drivers from the laptop manufacturer. Create a clear computer name and record the model, serial number, Windows edition, and recovery information in the workshop asset log.
A separate standard user account is useful for daily scanning, while an administrator account can handle approved installations and updates. This reduces accidental system changes without preventing authorized maintenance.
4. Secure Encryption and Recovery Before Installing Tools
If device encryption or BitLocker is active, back up the recovery key to an approved location that the workshop can access even when the laptop will not start. Microsoft notes that its support team cannot recreate a lost BitLocker key. Do not leave the only copy in a text file on the encrypted laptop.
Create a Windows recovery drive and confirm that important files are backed up. Keep customer reports, configuration notes, license records, and installers in controlled storage according to vendor terms. A full image made after a clean, tested setup can shorten recovery from a failed drive or incompatible update.
5. Keep Windows Security Enabled
Use Microsoft Defender or an approved business security product, firewall protection, and current security intelligence. Download installers only from verified suppliers and confirm digital signatures or published hashes when available. Diagnostic laptops handle customer vehicles, credentials, and sometimes online programming access, so treating them as disposable offline PCs creates unnecessary risk.
If a legitimate vendor documents an antivirus conflict, use the narrowest approved exclusion for the exact file, folder, or process. Microsoft warns that exclusions stop Defender from checking that content and can leave the device vulnerable. Never exclude an entire drive or permanently disable protection merely because an unknown installer requests it.
For a deeper risk discussion, read our guide to diagnostic software antivirus warnings.
6. Configure Power for Diagnostic Sessions
During scanning, coding, calibration, or programming, connect the laptop to AC power and verify the battery is charging. In Windows 11, review Settings > System > Power & battery > Screen, sleep, & hibernate timeouts. Prevent sleep while plugged in for the duration of a critical session, and check the lid-close action if the laptop may be partly closed on a cart.
Return energy-saving settings when the special session is complete. Laptop power does not replace a suitable vehicle battery support unit; both sides of the diagnostic connection must remain stable.
7. Control Windows Updates Without Abandoning Them
Install security and quality updates during a planned maintenance window, then reboot and test the diagnostic stack before returning the laptop to service. Configure active hours and scheduled restarts so Windows does not reboot during workshop operations. Microsoft allows updates to be paused temporarily, but not avoided indefinitely.
Before a major Windows feature update, check compatibility notices from every critical diagnostic vendor and create a fresh backup. Keep one known-good workshop laptop available when an urgent programming job cannot wait for troubleshooting.
8. Install VCIs and Diagnostic Software Methodically
- Create a restore point or baseline image.
- Install one diagnostic suite using its official instructions.
- Install the matching VCI driver and firmware package.
- Connect the interface only when the installer tells you to.
- Confirm the device appears correctly in Device Manager and the vendor connection utility.
- Test USB or Ethernet communication before adding another platform.
- Record software, driver, and firmware versions that passed testing.
Do not install several similar pass-thru drivers at once and then guess which change caused a failure. When Ethernet or DoIP is used, label the dedicated network adapter, document its configuration, and avoid changing firewall, VPN, or IP settings without recording the original values. See our DoIP versus CAN guide for the hardware and network differences.
9. Build a Simple File and Backup Structure
Create separate folders for installers, verified drivers, vehicle reports, screenshots, calibration records, and exported settings. Use repair-order or VIN-based subfolders while following privacy requirements. Back up reports after each workday and test restoration periodically; a backup that has never been restored is only an assumption.
10. Validate the Finished Laptop
Test each VCI on an appropriate vehicle. Confirm VIN identification, full-module scan, live data, report saving, network access, printing, and secure-gateway login where applicable. Verify sleep is disabled during a simulated extended session and that normal settings return afterward. Save this working configuration as the baseline.
Avsluttende konklusjon
A dependable Windows 11 diagnostic laptop combines supported hardware, clean software, stable power, controlled updates, active security, verified drivers, and recoverable backups. Document each change and test one platform at a time. That discipline turns the laptop into a repeatable workshop tool instead of another variable in the diagnostic process.
 English
  German
  Spanish
  Italian
  French
  Hebrew
  Dutch
Dutch  Finnish
  Norwegian
  Swedish
  Polish