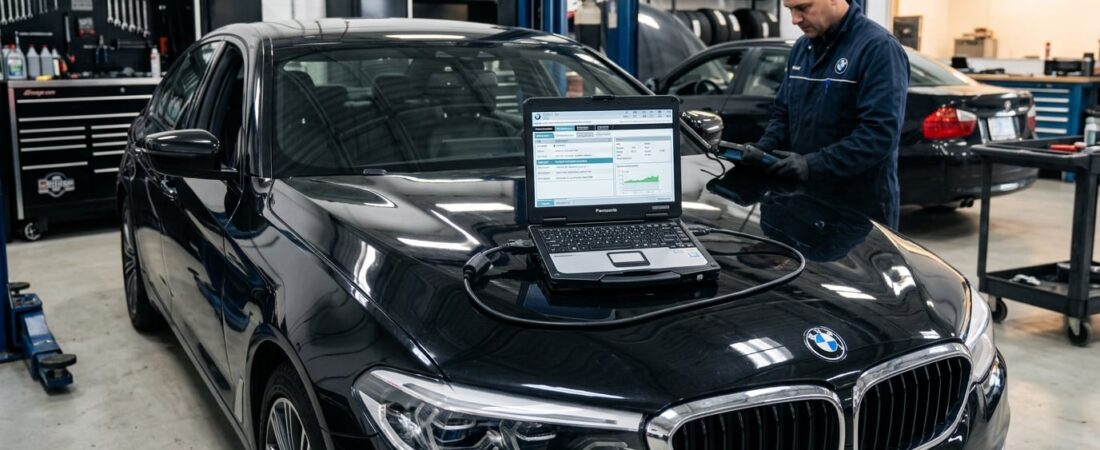
If you own a BMW and want to unlock professional-level diagnostics, coding, and battery registration capabilities without paying dealer prices, ISTA+ is your answer. This powerful OEM diagnostic software gives you the same tools BMW technicians use—right from your home garage or independent workshop.
In this comprehensive guide, we’ll walk you through the complete ISTA+ v4.32 installation process, from downloading the software to running your first vehicle scan.
What is BMW ISTA+?
ISTA+ (Integrated Service Technical Application) is BMW’s official diagnostic software platform used by dealerships worldwide. It provides deep-level access to every control module in your BMW, allowing you to:
- Read and clear fault codes from all ECUs
- View live data streams and sensor readings
- Perform coding and programming functions
- Register batteries after replacement
- Run comprehensive vehicle test plans
- Access BMW’s guided troubleshooting workflows
- Perform adaptations and calibrations
Unlike consumer-grade OBD2 scanners, ISTA+ gives you factory-level control over your BMW’s electronic systems—from the engine and transmission to comfort features, ADAS modules, and more.
System Requirements
Before you begin the installation, ensure your computer meets these minimum specifications:
- Operating System: Windows 7, 8, 10, or 11 (64-bit recommended)
- Processor: Intel Core i3 or better
- RAM: 4GB minimum, 8GB recommended
- Storage: 50GB free disk space
- Display: 1280×1024 resolution or higher
- USB Ports: At least one free USB 2.0/3.0 port
- Network Adapter: Ethernet port (for ENET cable connection)
Choosing Your Diagnostic Interface
ISTA+ supports several BMW diagnostic interfaces. Your choice depends on budget and the functions you need:
ENET Cable (Recommended for Most Users)
The ENET (Ethernet) cable is the most affordable and widely-used option for BMW diagnostics. It connects to your laptop’s Ethernet port and plugs into the OBD2 port under the dashboard.
Pros:
- Low cost ($20-50)
- Supports all diagnostic functions
- Works with E-series, F-series, G-series BMWs
- No additional drivers needed
Cons:
- Limited programming capability on some models
- Not suitable for older K-line vehicles (pre-2007)
K+DCAN Cable
The K+DCAN cable is ideal if you work with older BMW models (2001-2008) that use K-line or CAN protocols.
Pros:
- Supports older E-series models
- Works with both K-line and CAN-bus vehicles
- Affordable alternative
Cons:
- Requires specific driver installation
- Slower communication speed than ENET
ICOM Interface (Professional Grade)
The ICOM (Integrated Communication Optical Module) is BMW’s official dealer-level interface, available in ICOM A2, A3, and NEXT versions.
Pros:
- Fastest communication speed
- Full programming and coding support
- Works with all BMW models from 1996 onward
- Supports DoIP (Diagnostics over IP) protocol
Cons:
- High cost ($300-1000+)
- Overkill for most home users
For this guide, we’ll proceed with the ENET cable setup, as it offers the best value for independent workshops and enthusiast BMW owners.
Step 1: Download ISTA+ v4.32
ISTA+ is available as a standalone installer package. Download the ISTA+ v4.32 archive file from your trusted source. The file size is typically around 40-45GB, so ensure you have sufficient storage and a stable internet connection.
Step 2: Extract the Installation Files
Once downloaded, extract the ISTA+ archive to a dedicated folder on your hard drive. We recommend creating a folder like C:\BMW\ISTA+ to keep everything organized.
Important: Do not install to the default Program Files directory, as Windows permission restrictions can cause issues during activation.
Step 3: Select Language Databases
During extraction, you’ll be prompted to select language databases. ISTA+ v4.32 includes:
- English (recommended for most users)
- German (DE – Deutsch)
- Italian (IT – Italiano)
- French (FR – Français)
- Spanish (ES – Español)
Choose your preferred language(s). If you only need English diagnostics, selecting only English will save significant disk space (each additional language adds 5-8GB).
Step 4: Run the ISTA+ Installer
Navigate to the extracted folder and locate setup.exe or the installer batch file.
- Right-click the installer and select “Run as Administrator”
- Follow the on-screen prompts
- Accept the license agreement
- Choose the installation directory (keep the default or select your custom folder)
- Select “Complete Installation” when prompted
- Wait for the installation to complete (15-30 minutes depending on your system)
The installer will set up all necessary components, including:
- ISTA+ application files
- BMW diagnostic databases
- Vehicle communication drivers
- Support libraries and runtime components
Step 5: Configure Your Diagnostic Interface
After installation, you need to tell ISTA+ which hardware interface you’re using.
For ENET Cable:
- Connect your ENET cable to your laptop’s Ethernet port
- Plug the OBD2 connector into your BMW’s diagnostic port (usually located under the driver’s side dashboard)
- Turn your BMW ignition to position II (all dashboard lights on, engine off)
- Windows should automatically detect the connection
Setting up the Interface in ISTA+:
- Launch ISTA+ from the desktop shortcut
- Click on “Administration” in the main menu
- Select “VCI Manager” (Vehicle Communication Interface)
- Choose “ENET” from the dropdown list
- Click “Test Connection” to verify communication
- Save the settings
Step 6: Create Desktop Shortcuts
For quick access, create shortcuts for the main ISTA+ components:
- ISTA+ – Main diagnostic application
- ISTA/P – Programming module (if included)
- Rheingold – Unified diagnostic platform (newer interface)
Right-click each application executable and select “Send to > Desktop (create shortcut).”
Step 7: First Launch and Vehicle Connection
Now comes the exciting part—connecting to your BMW for the first time.
Launch ISTA+:
- Double-click the ISTA+ desktop shortcut
- Wait for the application to load (first launch takes 2-3 minutes)
- You’ll see the main ISTA+ interface with options for “Identification,” “Diagnosis,” and “Programming”
Identify Your Vehicle:
- Click “Identification”
- Select “Automatic Vehicle Identification”
- ISTA+ will communicate with your BMW via the ENET cable
- The VIN and vehicle details will populate automatically
- Click “OK” to proceed
Read Fault Codes:
- Click “Diagnosis”
- Select “Read Fault Codes”
- ISTA+ will scan all control modules (this takes 2-5 minutes)
- A list of fault codes will appear with descriptions and suggested repairs
- You can clear codes after repairs by selecting “Clear Fault Memory”
Run a Vehicle Test Plan:
- From the main menu, select “Test Plans”
- Choose a relevant test plan (e.g., “Complete Vehicle Test”)
- Follow the guided workflow
- ISTA+ will perform automated tests and display results
Troubleshooting Common Issues
“No Communication with Vehicle”
Solution:
- Verify ignition is in position II
- Check ENET cable connections
- Restart ISTA+ and try again
- Ensure Windows Firewall isn’t blocking communication
“License Expired” or Activation Error
Solution:
- ISTA+ v4.32 standalone versions typically come pre-activated
- If you see license errors, check for included activation tools or patches
- Run any included patch or keygen utilities as administrator
Slow Performance or Freezing
Solution:
- Close unnecessary background applications
- Increase virtual memory allocation in Windows
- Install ISTA+ on an SSD for faster performance
- Ensure your antivirus isn’t scanning ISTA+ files during operation
Interface Not Detected
Solution:
- Reinstall ENET drivers from the ISTA+ installation folder
- Try a different USB or Ethernet port
- Update your network adapter drivers via Device Manager
ISTA+ vs ISTA/P: What’s the Difference?
You may have seen references to both ISTA+ and ISTA/P. Here’s the distinction:
- ISTA+ = Diagnostics and coding (what we covered in this guide)
- ISTA/P = Programming and flashing ECU firmware
Both applications often come bundled together in complete ISTA installations. ISTA/P is used for more advanced operations like:
- ECU software updates
- Module initialization after replacement
- Complete ECU programming
For most diagnostic and coding tasks, ISTA+ alone is sufficient.
Supported BMW Models
ISTA+ v4.32 supports virtually all BMW models:
- E-Series (2006-2013): E60, E90, E92, E82, E70, E71
- F-Series (2011-2019): F10, F30, F32, F25, F15, F16
- G-Series (2015-2024): G20, G30, G11, G01, G05
- I-Series Electric: i3, i8, iX, i4
- MINI models (with ISTA/D MINI variant)
ISTA+ also supports BMW motorcycles with the appropriate interface and software variant.
Final Thoughts
Installing BMW ISTA+ v4.32 opens up a world of professional diagnostic capabilities for independent workshops and BMW enthusiasts. With the right interface (an ENET cable for most users), you can diagnose issues, clear fault codes, register batteries, and even perform coding functions—all without visiting the dealer.
The initial setup takes about an hour, but the long-term benefits are enormous: faster troubleshooting, cost savings on diagnostics, and the satisfaction of maintaining your BMW with factory-level precision.
Ready to take full control of your BMW’s diagnostics? Download ISTA+ v4.32 today and start diagnosing like a pro.
 English
  German
  Spanish
  Italian
  French
  Hebrew
  Dutch
Dutch  Finnish
  Norwegian
  Swedish
  Polish