
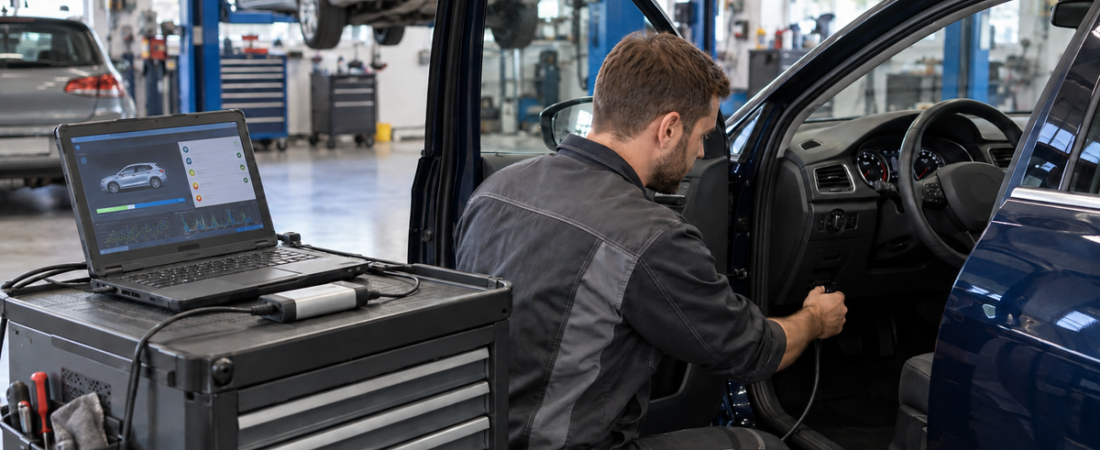
Autocom 2021 is a legacy multi-brand diagnostic software release used with compatible vehicle communication interfaces for passenger cars, light commercial vehicles, and, with the appropriate product, heavy vehicles. A successful setup depends on matching the software license, interface, drivers, and vehicle database rather than simply running an installer.
This Autocom 2021 installation and activation guide explains a safe workshop workflow for a legitimately licensed package. It does not use key generators, shared activation codes, modified executables, or permanent antivirus exclusions. Those methods can expose a diagnostic laptop to malware and may leave the interface unusable or unable to access current protected vehicles.
Check Whether Autocom 2021 Fits the Job
A 2021 database can still cover many older vehicles, but it will not include every later model, control unit, or security change. Check the licensed vehicle list and confirm whether you need CARS for passenger cars and light commercial vehicles, TRUCKS for commercial vehicles, or both.
Autocom’s current requirements specify Windows 11, but that does not guarantee a legacy 2021 release will run correctly on a new computer. Ask the distributor which Windows build supports your specific license before changing an established diagnostic laptop.
What You Need Before Installation
- A dedicated Windows laptop that matches the requirements for your licensed 2021 package
- Administrator access, a working USB port, and Bluetooth if you plan to use it
- The complete installer obtained from Autocom or an authorized distributor
- A valid CARS or TRUCKS license and its approved activation method
- The genuine, licensed VCI assigned to that software package
- A reliable USB cable for initial configuration
- Internet access for license validation, updates, and supported online services
Record the VCI serial number, software release, and license expiration. If setup asks for a hardware type, use the exact information supplied for your interface. Guessing can install the wrong communication profile.
Step 1: Prepare the Workshop Laptop
Connect the charger, install supported Windows updates, restart, and confirm the clock. Disable sleep while plugged in so installation and vehicle scans cannot be interrupted. Back up a computer that already contains working diagnostic applications.
Keep Windows Security enabled and verify the installer’s source and digital signature. If security software blocks startup, investigate the file and contact the distributor. Use a narrow exception only for a verified official component when support requires it. Our diagnostic software antivirus guide explains the process.
Step 2: Install the Licensed Autocom Package
- Disconnect the VCI. Leave the interface unplugged until the application has installed its drivers.
- Copy the installer locally. Extract the entire authorized archive to a short folder path. Do not launch setup from inside a compressed file.
- Verify the release. Confirm that the package matches your paid CARS or TRUCKS license and intended interface.
- Run setup as administrator. Accept the license agreement and choose the documented language, region, and installation directory.
- Select the correct hardware profile. Use the model or type provided by the interface vendor. Do not experiment with firmware choices.
- Allow prerequisites to finish. Drivers may open separate installers or pause the main progress display.
- Restart Windows. Reboot when prompted so services and virtual communication ports can register.
If setup requests a replacement executable or generated code, stop and verify the package. Legitimate activation remains traceable to the licensed VCI, security device, account, or distributor.
Step 3: Activate Autocom Legally
Activation varies across hardware generations. Follow the workflow supplied with your serial number. Autocom’s current system uses a USB security dongle paired with the ICON serial number; its License Activation Tool, or LAT, retrieves the license assigned to that device.
- Connect the licensed security device or VCI as directed by your distributor.
- Open the official License Activation Tool or the activation window installed with your package.
- Confirm that the displayed serial number matches the physical interface.
- Connect to the internet and let the tool retrieve the purchased license information.
- Verify that CARS, TRUCKS, and any optional data modules show the expected entitlement and expiration date.
- Close the activation utility, restart the diagnostic application, and confirm that it opens without demo-mode restrictions.
Do not send a hardware fingerprint to an unknown code generator. If the paid entitlement does not appear, provide the serial number and purchase details to the authorized distributor.
Step 4: Configure and Test the VCI
Start with USB to remove Bluetooth variables. Power the VCI through the vehicle or an approved bench source, then connect USB. In Hardware Configuration, search for the device, select its COM port, and run the test.
If the application offers a firmware update, confirm that the update belongs to your exact VCI and keep power and USB connected until it completes. Interrupting firmware installation can leave the interface unable to communicate. For help choosing suitable hardware, see our comparison of J2534, OEM VCI, and ELM327 interfaces.
After USB works, configure Bluetooth if needed. Power the VCI, enable Bluetooth, search from Autocom settings, choose the correct serial number, and press Test.
Step 5: Perform a Safe First Scan
- Check battery condition and connect battery support for a long diagnostic session.
- Turn the ignition on as directed without starting the engine.
- Select the vehicle manually or use VIN identification when supported.
- Verify model, year, engine, and system before opening a control unit.
- Run a complete system scan and save the original report.
- Review codes and live data before clearing anything.
- Repeat the scan after repairs and retain the post-scan report.
A legacy installation may identify a vehicle yet lack authorization for a protected function. Many manufacturers now place clearing, adaptation, or coding behind secure gateways. Current Autocom products use account-based Secure Gateway services for supported brands. Read our Secure Gateway troubleshooting guide if the scan works but a write operation is denied.
Common Installation Problems
The Application Does Not Open
Restart Windows, check the license status, and review the official installation log. If security software blocked a verified component, ask the distributor for the correct remediation rather than disabling protection globally.
The VCI Is Not Detected
Confirm that it is powered, try a known-good USB cable and port, and inspect Windows Device Manager for driver or COM-port errors. Reinstall only the driver intended for that interface.
The License Is Missing
Check the internet connection, serial number, security device, and paid release entitlement. Run the official activation utility again, then contact the distributor if the license database still returns the wrong product.
Keep the Installation Dependable
Once Autocom works, save a clean system backup and document the software, database, firmware, and license versions. Test the interface before booked jobs. For current coverage and security access, compare the legacy package with the latest licensed release available for your hardware.
 English
  German
  Spanish
  Italian
  French
  Hebrew
  Dutch
Dutch  Finnish
  Norwegian
  Swedish
  Polish