
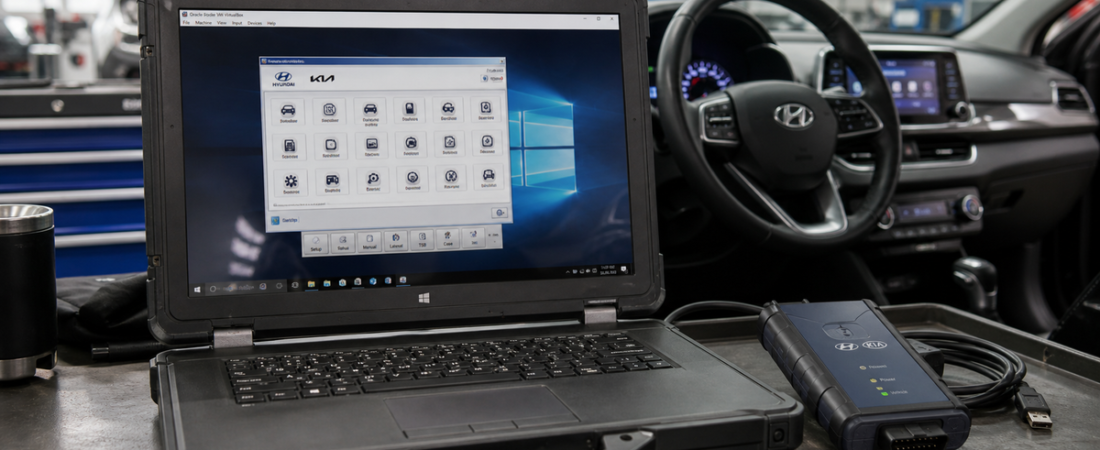
Hyundai GDS Diagnostic Software: VMware Virtual Machine Installation & First Connection Guide
Hyundai GDS is still one of the most practical factory-style platforms for Hyundai and Kia diagnostics, but many users hesitate because the software is commonly distributed as a prebuilt virtual machine instead of a simple Windows installer. That sounds intimidating at first, yet the VMware approach is often easier because the operating system, application files, and supporting environment are already bundled together.
This Hyundai GDS installation guide turns the raw local source material into a workflow you can follow without guesswork. It covers VMware Player installation, where to place the virtual machine files, how to handle the important I copied it prompt, how to pass the VCI through to the guest system, and how to complete your first scan cleanly. If you are still deciding what cable belongs in your setup, read our Sammenligning mellom J2534, OEM VCI og ELM327 before you buy hardware.
Hva du trenger før du setter i gang
Before you import anything into VMware, treat this like a workshop software install rather than a casual app download. Use a stable Windows laptop, keep it on AC power, and store the VM on an internal SSD if possible. Hyundai GDS can run on slower systems, but the experience improves a lot when the host machine has enough memory and the VM files are not sitting on a slow USB drive.
- A Windows laptop or desktop with administrator rights
- VMware Workstation Player installed
- The extracted Hyundai GDS virtual machine files, including the .vmx configuration file and .vmdk disk file
- A Hyundai-compatible diagnostic interface or VCI if you plan to connect to a vehicle right away
- BIOS virtualization enabled if your PC has not used virtual machines before
It is also worth reviewing our diagnostic software best practices before the first live session. Stable power, a reliable USB connection, and a laptop that will not sleep mid-scan matter just as much inside a VM as they do on a native install.
Step 1: Install VMware Workstation Player
The local Hyundai source starts with VMware Player, and that is the correct place to begin. Download the VMware Workstation Player package referenced in your OBD-Soft materials, run the installer, and choose the standard Typical installation path unless you have a specific reason to customize it.
Let the installation complete fully, then restart the PC if VMware asks for it. Skipping the reboot is a common way to create USB oddities later when you try to hand the Hyundai interface from the host system to the virtual machine.
Step 2: Extract and Store the Hyundai GDS Virtual Machine Properly
Next, extract the Hyundai GDS archive so the full VM folder is available on disk. The source notes that you should see the core virtual machine files after extraction, especially the .vmx file and the .vmdk virtual disk. Do not try to run GDS from inside a compressed archive and do not scatter the files across different folders.
Place the entire folder somewhere permanent, such as C:\VMs\Hyundai_GDS. VMware expects the VM files to stay where they were first opened, and moving them later can create broken paths or missing-disk prompts.
Step 3: Open the VM and Choose the Correct VMware Prompt
Launch VMware Workstation Player and click Open a Virtual Machine. Browse to the Hyundai GDS .vmx file and open it. At this point VMware may ask whether you moved the VM or copied it. The local source is explicit here: choose I copied it.
That prompt matters because VMware uses it to decide how to generate the machine identity. Choosing the copied option is the safer path for these prebuilt diagnostic VMs.
Step 4: Adjust Memory, CPU, USB, and Network Settings
Åpne Edit virtual machine settings and review the resource allocation. The local source recommends increasing memory and processor resources depending on the host PC. Give the VM enough headroom to launch GDS smoothly, but do not over-allocate resources and starve the host.
- Increase memory based on your host system capacity
- Assign multiple CPU cores if the PC has them available
- Make sure the USB Controller is enabled before the first boot
- Leave networking on NAT unless you have a specific workshop network requirement
Step 5: Pass the Hyundai VCI Through to the Virtual Machine
After the VM settings are in place, connect your Hyundai diagnostic interface to the host PC by USB. When VMware Player is open, go to Player > Removable Devices, select the Hyundai USB device, and click Connect (Disconnect from host). That step hands the interface to the guest operating system so GDS can actually see it.
If the vehicle still refuses to link after that, do not assume the software itself is broken. First confirm the USB handoff really happened, then check the cable, ignition state, and vehicle-side basics. Our Veiledning for feilsøking ved manglende kommunikasjon med kjøretøyet is the fastest way to separate a VMware issue from a real connection problem.
Step 6: Start GDS and Complete the First Connection
Klikk Play virtual machine and let the guest operating system boot fully. Log in with the credentials supplied with your VM package if the image requests them, then launch Hyundai GDS from the desktop or Start menu inside the guest environment.
For the first diagnostic session, connect the VCI to the vehicle only after the VM is stable and GDS is ready. Once the application opens, select the correct Hyundai or Kia model, confirm communication with the interface, and run a basic scan before attempting any deeper functions.
Common Hyundai GDS VMware Problems and Quick Fixes
- The VM feels very slow: Increase RAM or CPU allocation moderately and close heavy host applications before launching VMware.
- The VCI is not detected in GDS: Reconnect the device through the VMware removable-devices menu and confirm the host is no longer holding it.
- The VM will not start: Enable Intel VT-x or AMD-V virtualization in BIOS or UEFI, then reboot and try again.
- The screen resolution is too small: Install VMware Tools inside the guest if the image does not already include it.
- The scan drops unexpectedly: Recheck USB stability and keep the laptop on AC power during testing.
Most Hyundai GDS install failures are not true software failures. They usually come from four causes: the VM files were moved after setup, the wrong VMware prompt was chosen, the USB device was never passed to the guest, or the host machine does not have virtualization enabled.
Avsluttende konklusjon
The safest way to approach a Hyundai GDS installation guide is to think in layers: install VMware Player, store the GDS VM in a permanent folder, open the .vmx file and choose I copied it, tune the VM resources, pass the VCI through to the guest, and only then perform the first scan.
Follow that order and Hyundai GDS becomes much more manageable, even on a general workshop laptop. In many cases, the virtual-machine approach is the cleanest way to run Hyundai dealer-style diagnostics without rebuilding the environment manually every time.
 English
  German
  Spanish
  Italian
  French
  Hebrew
  Dutch
Dutch  Finnish
  Norwegian
  Swedish
  Polish